Admin Authorization with External IAM
In the past tutorials, the administrator utilized a static API key for authentication and authorization. The Agent also features a more sophisticated role-based authorization mechanism using external IAM, allowing users to be authorized under different roles and granting access to parts of the Agent.
Roles
For the Agent admin authorization, we need to distinguish the administrator of each component:
- Agent Administrator
- Keycloak Administrator
The same person may also represent these roles.
Prerequisites
- Keycloak is up and running
- Keycloak is configured as follows
- A realm called
my-realmis created - A client called
cloud-agentundermy-realmwith authorization feature is created. (See create client instruction) - Make sure the
cloud-agentclient has direct access grants enabled to simplify the login
- A realm called
- The Cloud Agent is up and running
- The Cloud Agent is configured with the following environment variables:
KEYCLOAK_ENABLED=trueKEYCLOAK_URL=http://localhost:9980(replace with appropriate value)KEYCLOAK_REALM=my-realmKEYCLOAK_CLIENT_ID=cloud-agentKEYCLOAK_CLIENT_SECRET=<KEYCLOAK_CLIENT_SECRET>(replace with appropriate value)KEYCLOAL_ROLES_CLAIM_PATH=resource_access.cloud-agent.roles
Overview
This tutorial will guide you through the steps to configure roles in Keycloak and demonstrate the authorization process as an administrator within the agent, enabling you to perform various administrative tasks.
Once authorized as an admin, the user gains the ability to manage the wallet; however, the actual utilization of the wallet remains restricted. Despite UMA permissions configured for the user, the agent strictly maintains a clear segregation of roles between administrator and tenant.
Endpoints
Agent endpoints
| Endpoint | Description | Role |
|---|---|---|
GET /wallets | List the wallets on the Cloud Agent | Administrator |
Keycloak endpoints
| Endpoint | Description | Role |
|---|---|---|
POST /realms/{realm}/protocol/openid-connect/token | Issue a new JWT token | Administrator |
Keycloak Administrator interactions
1. Configure Keycloak role on the client
Open the Keycloak admin UI in the browser and navigate to my-realm in the admin UI.
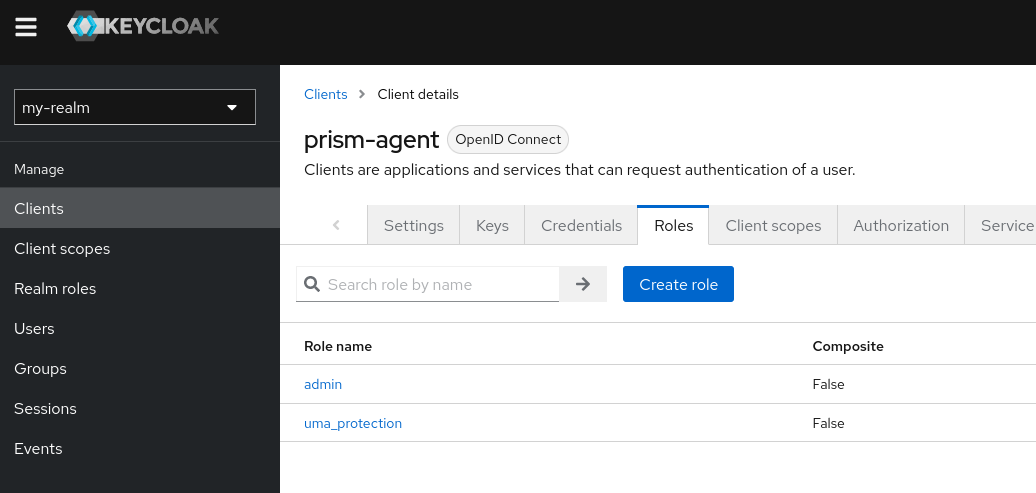
Choose the corresponding client to create a ClientRole.
Choose Role tab in the client menu and create a new role called admin
2. Assign the admin role to the user
Once the role gets created, the admin user should be assigned this role. For simplicity, we will assign the role to the user without managing any group or other metadata.
Navigate to Users menu on the sidebar in the admin UI.
Click on the user that should have the admin role.
Choose Role Mapping tab and click Assign Role.
Choose Filter by clients in the dropdown menu. Then choose the admin role.
Fore more info on role mapping see the Keycloak official documentation. If a user does not exist, a new user can be created by following this Keycloak official guide.
After this step, the user should have the admin role assigned, and after they log in, the roles claim should appear in the JWT payload.
Agent Administrator interactions
1. Obtain an access token from Keycloak
The admin user can log in using any configured authorization flow in Keycloak. In this example, the direct access grant is used to login.
Run the command to log in as admin.
curl -X 'POST' \
  'http://localhost:9980/realms/my-realm/protocol/openid-connect/token' \
  -d "grant_type=password" \
  -d "client_id=admin-cli" \
  -d "username=alice" \
  -d "password=1234"
Example token response (some fields omitted for readability)
{
    "access_token": "eyJhbGciOi...7ocDHofUDQ",
    "refresh_token": "eyJhbGciOi...otsEEi4eQA",
    ...
}
Inspecting the access_token payload, it should have the following content
{
  "resource_access": {
    "cloud-agent": {
      "roles": [
        "admin"
      ]
    },
    "account": {
      "roles": [
        "manage-account",
        "manage-account-links",
        "view-profile"
      ]
    }
  },
  ...
}
2. Perform a simple action to verify admin rights on the Agent
To prove that the admin can perform admin tasks,
try listing all the tenants' wallets using the JWT in the Authorization header.
curl --location --request GET 'http://localhost:8080/cloud-agent/wallets' \
  -H 'Authorization: Bearer eyJhbGciOi...e7H6W8RUvA' \
  -H 'Accept: application/json'
The response should return a list of all wallets on the Agent with HTTP status 200. Trying to perform prohibited tenant interactions, such as listing the DIDs in the wallet, will result in an authorization error.